Working with PostgreSQL databases often requires moving data in and out of tables, and PGAdmin makes this process seamless with its intuitive interface. If you have data in CSV or text files and want to bring it into your PostgreSQL table, here’s a clear, actionable guide to help you do it effortlessly.
Why Use PGAdmin for Data Import?
- User-friendly, graphical interface—no command-line needed
- Supports common file formats like CSV and TXT
- Provides error handling and encoding options
Steps to Import Data Using PGAdmin
1. Prepare Your Data File
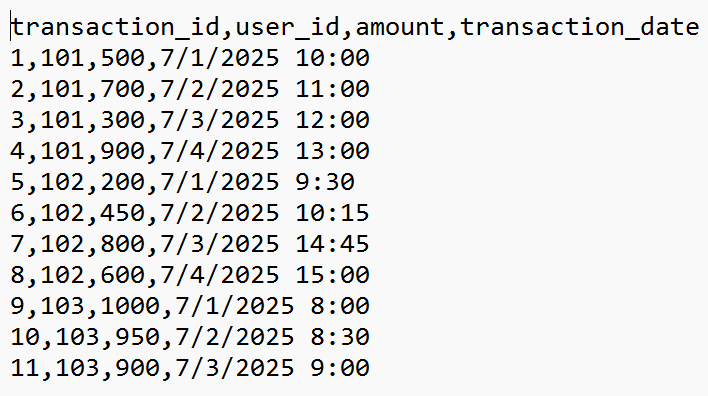
- Ensure your file is in CSV, TXT, or a compatible format.
- The column names and order should match those in your target PostgreSQL table.
- Save your file in an accessible location on your system.
2. Open PGAdmin and Connect to Your Database
- Launch the PGAdmin application.
- Connect to your PostgreSQL server and expand the database you want to use.
3. Create or Select the Target Table
- If your target table doesn’t exist, right-click “Tables” under your schema and choose Create > Table.
- Define the columns and data types that match your import file.
1
2
3
4
5
6
CREATE TABLE examples.transactions(
	transaction_id INT,
	user_id INT,
	amount INT,
	transaction_date TIMESTAMP
);
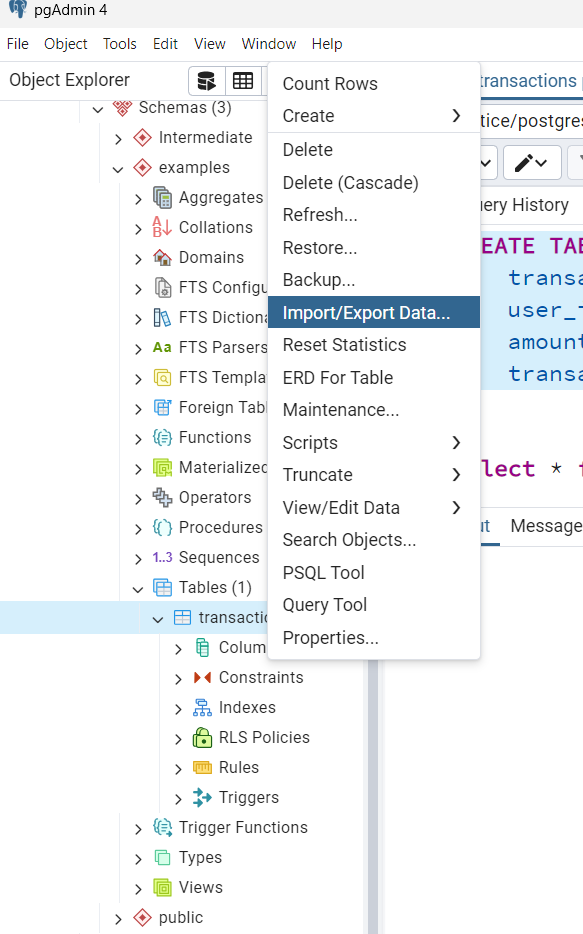
4. Open the Import/Export Data Dialog
- In the browser tree, locate the table you wish to import data into.
- Right-click the table and select Import/Export Data
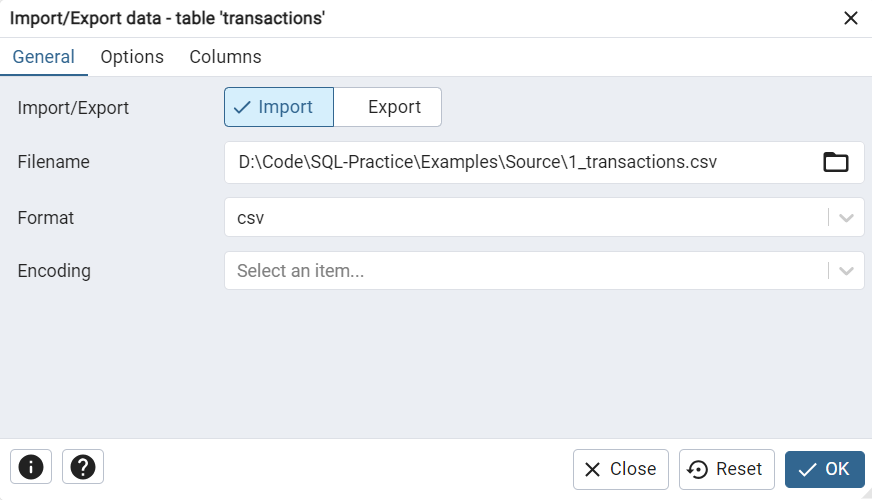
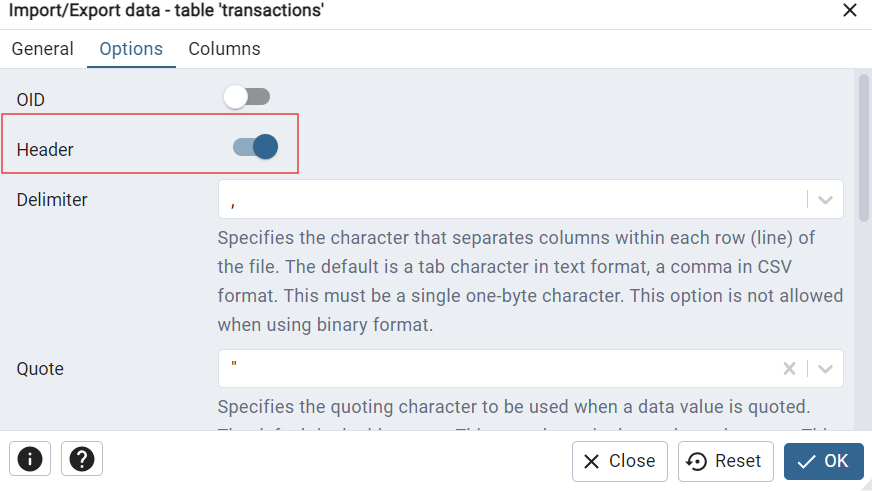
5. Configure the Import Options
Within the Import/Export Data window:
- Import/Export Switch: Set this to Import.
- Filename: Navigate and select your CSV/TXT file.
- Format: Choose the appropriate format (commonly
csv). - Encoding: Select the encoding that matches your file (defaults often work).
- Header: Check this if your data file contains column headers.
- Delimiter: Enter the character used for separating values (usually a comma for CSV).
- Error Handling: Set behavior for how errors are handled during import.
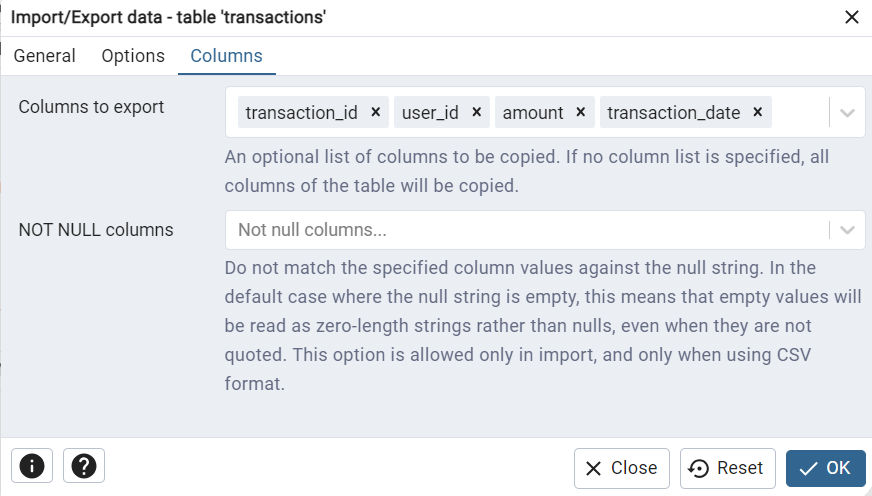
6. Review Columns (Optional)
- You can map or exclude specific columns in the Columns tab if needed.
7. Start the Import
- Click OK to start the import process.
- PGAdmin will run the import as a background process and notify you upon completion.
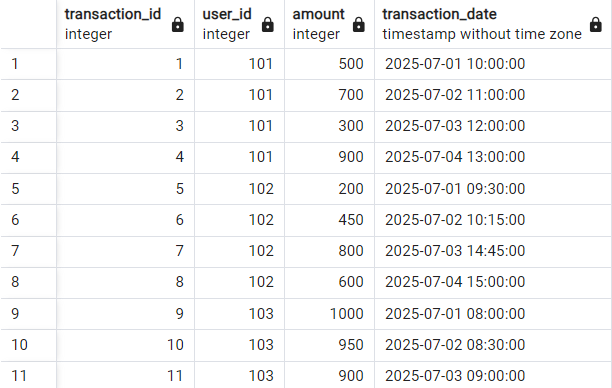
8. Verify Your Data
- Use a simple SQL query, e.g.,
SELECT * FROM your_table;to review the imported data. - Check for completeness and correctness of the import.
1
select * from examples.transactions;
Quick Tips and Troubleshooting
- Column Mismatch: Ensure your CSV columns match your table schema.
- File Size Limit: Some PGAdmin versions may restrict file size (e.g., 50MB).
- NULL Handling: Configure how NULL values are interpreted if necessary.
- Character Encoding: For UTF-8 files, verify encoding settings during import.
Alternative: Import via SQL Query
Use PGAdmin’s Query Tool to execute this SQL command if preferred:
COPY table_name FROM '/path/to/file.csv' DELIMITER ',' CSV HEADER;
This method gives you more control but requires the proper file permissions and path.
Conclusion
PGAdmin streamlines data import into PostgreSQL, whether you’re uploading a handful of rows or a massive dataset. By following these steps, you can move data into your database accurately and efficiently, setting the stage for analysis, reporting, or application development.
Leverage PGAdmin’s power to make PostgreSQL data management as smooth as possible!